Navigation
The Navigation menu for MRI Evolution appears on the side of the screen and contains the following:
- Agora
 Available from 7.0.0.0
 - Favourites Available from 5.0.0.0
- Facilities
- Task Management
- Modules
- Settings
- System Administration Available from 7.0.0.0
- System Administration
Available from 7.0.0.0
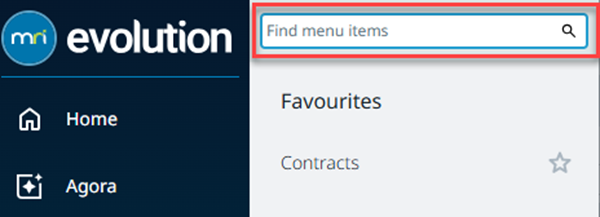
Version 7.0.0.0 adds a new menu search feature to improve the usability of MRI Evolution.
-
Click on any side menu group and the Find menu items search field will be displayed at the top:
-
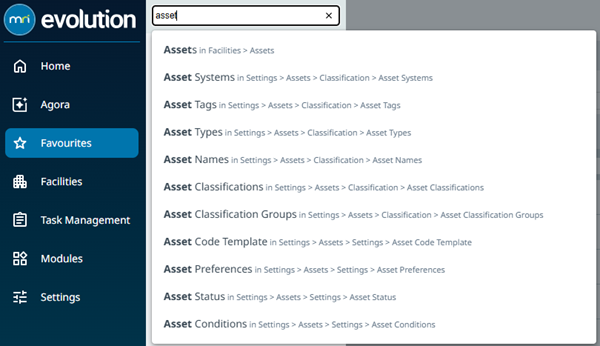
Type your search criteria to invoke a list of matching menu items, below is an example using asset as a search:
To navigate to the area required, either search for it in the Find menu items search field or click through from the appropriate Menu button group and select the applicable sub navigation from the available list.
| Menu Name | Description |
|---|---|
| Favourites |
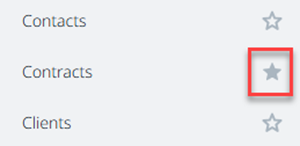
Available from 5.0.0.0 Favourites provides each user with a quick access list of their most frequently used navigation items. Instead of drilling through the full menu every time, starred items surface immediately when the Favourites menu option is selected. Favourites are stored for each user account and applied on next sign‑in. Add or remove an item by clicking its star icon in the menu navigation or within the Favourites list itself. For example, search for “Contracts” using the menu search box, click the star to pin it, then open Favourites to launch Contracts directly. (If a page requires permissions you must still have access—favouriting does not override security.)
|
| Facilities | The Facilities menu contains all of the actual elements such as Assets and Buildings used within your MRI Evolution system. |
| Task Management | The Task Management menu contains all the areas used for processing Tasks, including PPM (Planned Preventative Maintenance), Breakdowns, Scheduled and Project Tasks. |
| Modules | The Module menu contains all of the purchased add-on modules available to enhance the functionality of MRI Evolution. |
| Settings |
The Settings menu is used to set up key areas of the MRI Evolution system. It is typically used in the initial stages of implementing MRI Evolution and maintained thereafter. The System Administration menu group has been incorporated into the Settings menu. |
Common Toolbar Icons
Throughout MRI Evolution there are some commonly used icons.
| Icon | Name | Description |
|---|---|---|
|
|
Create New Entity | Allows the creation of a new entity. |
|
|
Edit | Allows the editing of an entity. |
|
|
Refresh | Refreshes data in a grid. |
|
|
Delete | Deletes an entity. |
|
|
Close | Closes a window without saving. |
|
|
Assign | Opens the pop up window to assign entities. |
|
|
Copy | Creates a copy of the entity. |
|
|
Report | Prints the report, relevant to the current window. |
|
|
Save | Saves the current window. |
|
|
Save and Close | Saves the current window and closes it. |
|
|
Save and New | Saves and closes the current window and opens a new window for entry. |
|
|
Show / Hide only records with Hazards or Alerts |
Available from 5.0.0.0 Click to toggle to grid to view entities with associated Hazards & Alerts. |
|
|
Show / Hide Historic Records |
Available from 5.0.0.0 Click to show of hide historic entities. |
Query and Filter Functionality
Available from 5.0.0.0
The filter and query section of the grid is now collapsible click Query Filter![]() to collapse / expand the menu
to collapse / expand the menu
Using Assignment Controls
Many areas of MRI Evolution involve choosing one or more items from a master list and assigning them to an entity.
Click Assign ![]() , a pop up window will open, entities in the right hand assignment window are connected.
, a pop up window will open, entities in the right hand assignment window are connected.
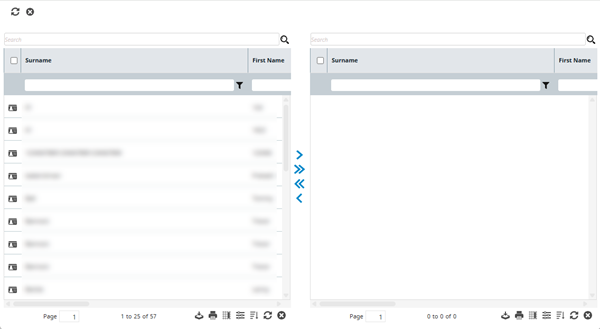
The left hand assignment window will show all entities that could be connected or assigned. The right hand window show all entities that have been connected or assigned.
Using the Shift or CTRL keys will allow the multiple highlighting or rows, or a single entity can be highlighted by clicking on it.
Once rows have been highlighted use the assignment keys to assign the appropriate entities.
Click Assign Selected ![]() to assign highlighted entities, or click Assign Page
to assign highlighted entities, or click Assign Page ![]() to assign a page of entities.
to assign a page of entities.
To remove an assigned entity click Un-assign Selected ![]() , or click Un-assign Page
, or click Un-assign Page ![]() .
.
Using Date Pickers
Many fields that hold dates can be completed manually or filled using a date or date/ time picker. To use the date picker, click the calendar ![]() by the field.
by the field.
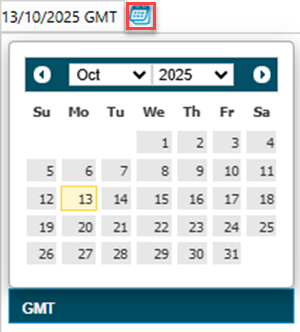
Select the required date from the calender and enter the appropriate time.
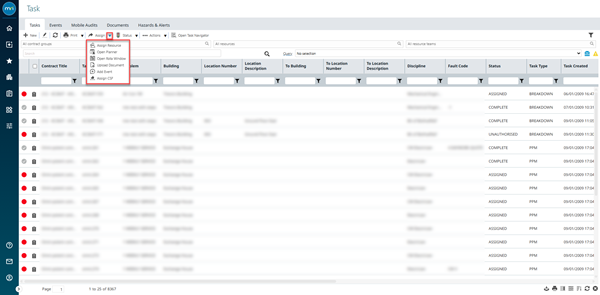
Toolbar Button Groups
Available from 5.0.0.0
The toolbar buttons are grouped together to simplify the screen layout. Click on the drop down arrow to access the full menu selection.
If the group is related to the state of an entity, then only the applicable options will be available, e.g. if a Task is in an unauthorised state, only authorise will be seen in the drop down, once authorised the ability to complete the Task will be available.
Viewing Linked System Data
Available from 5.0.0.0

Any "system" data linked to entities can be accessed via tabs in the entity grid these include:
- Documents
- Attributes
- Event
- Hazards & Alerts
- BIM Documents
- PMS Core Values
- Mobile Audits
Events will show all system events with the exception of Task Events which will link to F_EVENTS and Facilities Booking which will link to F_BK_EVENTS.
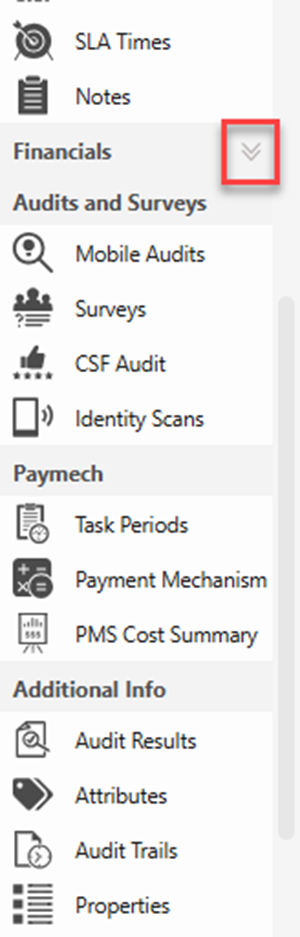
Collapsible Menus
Available from 5.0.0.0
Many screens have collapsible menus to optimise space. Click Collapse / Expand ![]() to view or hide the menu.
to view or hide the menu.
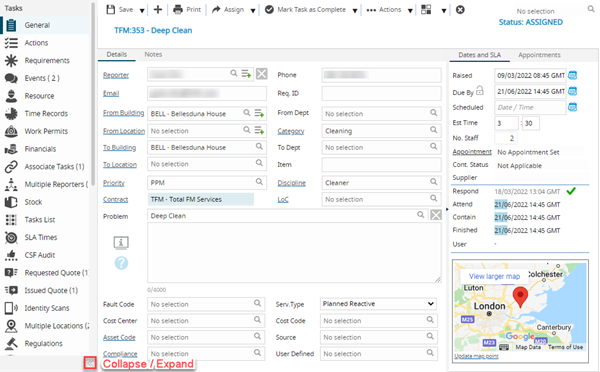
Collapsible menu’s are included in:
- The main system navigation
- SLA Target Panel on the Helpdesk
- The Task details section from a Tasks sub navigation .
- Task sub navigation panel sections e.g. General, Financials, Mobile Audits, Systems
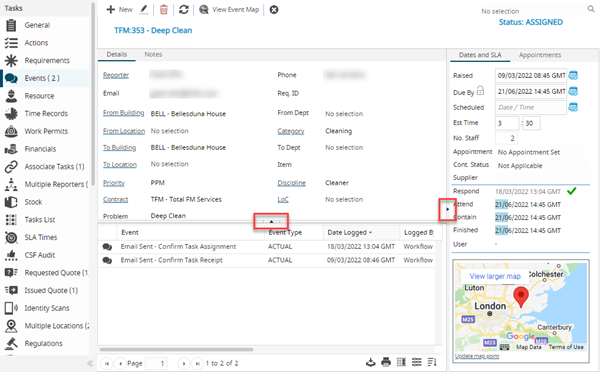
The input panel sub navigation menus displayed throughout MRI Evolution have vertically collapsible navigator groups in order to optimise space and allow users to show the most relevant menu options to them.
Available from 5.7.0.0
When collapsed, a visual indicator is displayed to indicate that the navigator group is collapsed, highlighted below: