Stock Take
Stock Takes verify that physical inventory matches system records by enabling systematic counting and reconciliation of stock items. Create a new Stock Take by clicking New, enter descriptive details (for example, "Q3 2024 Full Stock Count" or "Electrical Supplies Spot Check"), and select a Cost Centre and Contract. Add items to count using three methods: manually select specific items from your stock list, assign from pre-defined Stock Lists (for example, "Critical Spares" or "High Value Items"), or use the Random Stock Wizard to automatically generate a statistical sample. Once items are selected, physically count each item and enter the counted quantities in the Stock Take Results section—the system compares counted quantities against recorded quantities and highlights variances (for example, recorded 50 units, counted 47 units, variance -3). When you finalize the Stock Take, the system updates stock registers to match actual quantities and generates variance reports showing discrepancies. Schedule regular Stock Takes (for example, monthly for high-turnover items, quarterly for general stock, annually for full inventory) to maintain accuracy, identify theft or loss patterns, support audit requirements, and ensure materials are available when technicians need them for maintenance tasks.
Modules > Stores > Stock Takes
The link will open the Stock Take grid. It is a grid view which can be searched, sorted and customised as normal.
To add a new Stock Take click New ![]() , to edit an existing Stock Take click Edit
, to edit an existing Stock Take click Edit ![]() . A pop up window will appear which will allow the creation or amendment of a Stock Take.
. A pop up window will appear which will allow the creation or amendment of a Stock Take.
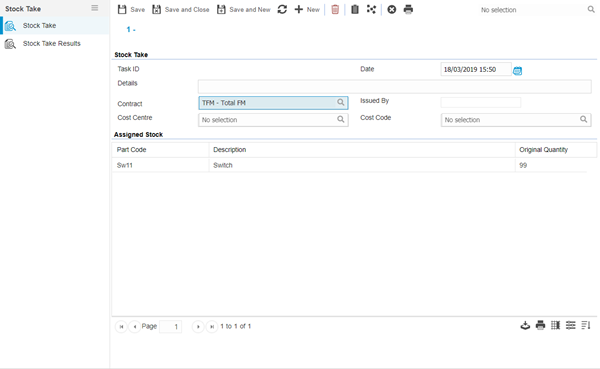
 Click to view - Stock Take Fields and Descriptions
Complete the fields and click Save ![]() . Once the Stock Take header has been completed and saved a sub navigation will appear to allow additional entities to be completed.
. Once the Stock Take header has been completed and saved a sub navigation will appear to allow additional entities to be completed.
These include:
- Stock Take Results
Manually adding Stock to the Stock Take (this button has been superseded by the Assign Stock function in version 5.7.0.0 below)
If particular Stock items are to be counted they can be added manually to the Stock Take.
Modules > Stores > Stock Takes
Click New ![]() , from the drop down select the Stock item to be added to the Stock Take.
, from the drop down select the Stock item to be added to the Stock Take.
From the drop downs select the required Stock and click Save and Close ![]() .
.
Assigning Stock to the Stock Take
Available from 5.7.0.0
An assignment option, suitable for bulk assignment of Stock Items to a Stock Take, has been added to replace the manual single item method above.
Clicking the ![]() assignment toolbar button will open an assignment window containing values from the Stock table, use the search field and/or column filters to target the Stock Items required for the Stock Take:
assignment toolbar button will open an assignment window containing values from the Stock table, use the search field and/or column filters to target the Stock Items required for the Stock Take:
-
The left hand side of the assignment window will show all Stock Items visible to the user that are not already allocated to the current Stock Take
-
The right hand side of the assignment window will show all Stock Items already assigned to the current Stock Take
As per standard system behaviour, the user will only be able to see Stock Items that are in Stock Locations allocated to the user's Account.
Modules > Stores > Stock Takes
Click ![]() Assign Stock to open an assignment window in order to add or remove Stock Items to the Stock Take.
Assign Stock to open an assignment window in order to add or remove Stock Items to the Stock Take.
Using the Stock Wizard
MRI Evolution can randomly generate Stock to be counted according to criteria set by the User.
Modules > Stores > Stock Takes
Click Random Stock Wizard ![]() , Enter the percentage of Stock to be counted and a date range.
, Enter the percentage of Stock to be counted and a date range.
Random selections will not be taken from any stores that have had a Stock take completed within the given date range.
The wizard will ask a variety of questions to dictate where the Stock to be counted is generated from, complete the wizard.
Raising a Task to complete the Stock Take
Once the Stock has been added to the Stock Take a Task can be generated for a Resource to complete.
Click Create Task ![]() , MRI Evolution will generate a breakdown Task to be assigned.
, MRI Evolution will generate a breakdown Task to be assigned.
Printing the Stock Take
The Stock Take can be printed so the Resource completed can manually record the results.
Click Stock Take Docket ![]() .
.
Stock Take Results
Once the Stock Take is completed, the results need to be recorded in the Stores Module so that adjustments can be made to reflect any discrepancies identified.
The Stock Take results are recorded in the Stock Take Results area of the Stock Take window. This window is automatically populated with the Stock items being reviewed and the quantities currently recorded in MRI Evolution.
Modules > Stores > Stock Takes
The link will open the Stock Take Results, enter the updated results in the Updated Qty fields. Once completed click Update ![]() , MRI Evolution will update the Stock register with the new results.
, MRI Evolution will update the Stock register with the new results.